


How to Choose Custom Vanlife Stickers for Campers
Last Updated: October 26, 2026
Quick Summary
Custom vanlife stickers for campers reflect your travel style and turn your rig into a personal statement, with design options ranging from retro and nature-inspired motifs to personalized lettering. Choose durable outdoor vinyl with multi-layer construction and UV resistance, then size and place your stickers carefully on body panels, doors, or windows using proper surface preparation and application techniques.
- Design styles include retro 1970s aesthetics, nature motifs like mountains and sunsets, personalized lettering, funny sayings, and bohemian patterns.
- Multi-layer vinyl construction with carrier film lasts longer and applies more easily than single-layer options.
- Typical costs range from $24-$50 for simple text to $145-$300 for full-side name stripes.
- Side body panels typically use 300-600 mm wide stickers, while windows and curved panels work best with 100-250 mm designs.
- Apply stickers between 10°C and 25°C on clean, alcohol-wiped surfaces using the hinge or wet method to avoid air bubbles.
Table of Contents
- Why Custom Vanlife Stickers Matter for Your Camper
- Vanlife Sticker Ideas and Design Styles to Consider
- Custom Camper Van Decals: Materials and Durability
- Outdoor Vinyl Decals for Campers: What Makes Them Last
- Camper Van Name Stickers and Personalised Lettering
- Sizing, Placement, and Application for Your Vehicle
- Ordering Your Custom Stickers from Mega Sticker Store
- Frequently Asked Questions
Why Custom Vanlife Stickers Matter for Your Camper
Custom vanlife stickers for campers do more than change your vehicle's appearance, they turn your rig into a reflection of who you are. Whether it's a weekend escape or full-time life on the road, the right decals make your camper feel like home and signal that you're part of the community.
Vanlife Sticker Ideas and Design Styles to Consider
Your camper's aesthetic should reflect your travel philosophy, retro vibes, nature-inspired designs, or bold personal statements.
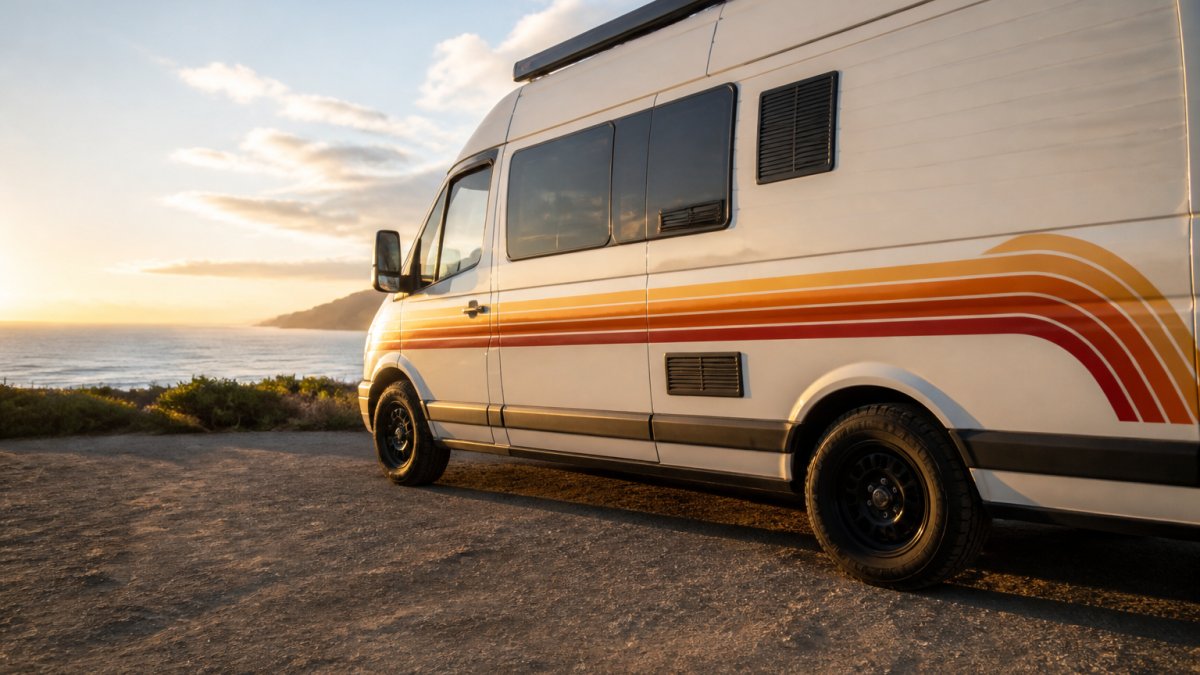
Retro and vintage styles include 1970s earth tones, flowing stripes, and nostalgic typography. Browse many van side graphics and stripe designs in different colors and styles to inspire your custom sticker choices.
Nature and outdoor motifs, mountain peaks, forest silhouettes, desert sunsets, abstract terrain, connect your rig to the places you explore.
Personalised lettering and custom text let you add a vehicle name, meaningful coordinates, or a travel motto.
Funny and novelty sayings include "Happy Camper" and "Making Memories."
Hippie and bohemian designs include peace signs, daisies, and psychedelic swirls.
Custom Camper Van Decals: Materials and Durability
Thickness and construction affect durability too. Multi-layer construction with a carrier film lasts longer and applies more easily, the film keeps the sticker aligned during installation and peels off cleanly.
How to test durability before you commit
You cannot run a full weather test in a shop, but you can ask suppliers the right questions and run a simple home check:
- Ask for the vinyl rating and overlaminate inclusion. A supplier who cannot state the expected outdoor life is a warning sign.
- Request a sample offcut. Apply it to a clean, inconspicuous panel for a few weeks of sun and rain, then check for edge lift, colour shift, and adhesive residue.
- Check the backing paper. Quality vinyl releases cleanly; cheap vinyl tears or leaves adhesive behind.
Care, washing, and removal
Outdoor Vinyl Decals for Campers: What Makes Them Last
Learn in depth about UV resistance and durability of vinyl to make an informed decision about sticker longevity.
Camper Van Name Stickers and Personalised Lettering
Custom Caravan Decal from Photo, Personalised Caricature Vehicle Sticker →
| Design Choice | Best For | Typical Cost |
|---|---|---|
| Simple text lettering | Budget-conscious travellers | $24-$50 |
| Custom text with graphics | Personalised, unique look | $75-$150 |
| Full-side name stripe | Maximum visibility | $145-$300 |
| Photo-to-caricature decal | One-of-a-kind memory piece | $75 |
Sizing, Placement, and Application for Your Vehicle
Getting the size and placement right is critical: too small and the sticker disappears, too large and it overwhelms the space. Use this sizing guide, placement advice, and application workflow to order and install with confidence.
Sizing guide by vehicle surface
Use these starting points as a guide, then measure your own panels, sizes are ranges because vehicle dimensions vary.
| Surface | Typical sticker size | Best use | Notes |
|---|---|---|---|
| Side body panel | 300-600 mm wide | Main design, name, or stripe | Measure the flat area between seams and wheel arches |
| Rear door or tailgate | 200-400 mm wide | Secondary design or motto | Check for handles, hinges, and badge placement |
| Window (side or rear) | 100-250 mm wide | Small accents or text | Use window-grade vinyl if the sticker must be seen from inside |
| Front door | 150-300 mm wide | Name or small graphic | Avoid the door edge and lock area |
| Curved panel | 100-200 mm wide | Small accent stickers | Large graphics need conformable vinyl and careful installation |
Measure twice, order once. Take accurate measurements and decide whether the sticker should span a full panel or sit as an accent. A design that looks right on a flat proof can look cramped on a curved door.
Application workflow
A clean surface and a patient approach matter more than expensive tools:
- Prepare the surface. Wash the panel, wipe with rubbing alcohol, and let it dry completely. Do not apply over wax, polish, or silicone residue.
- Mark your position. Use masking tape to set a level baseline and mark the centre point, then dry-fit the sticker before removing the backing.
- Apply in mild conditions. Most vinyl applies best between 10°C and 25°C, cold makes adhesive sluggish and heat stretches the vinyl.
- Use the hinge or wet method. For larger decals, peel a small section of backing, anchor it with tape, and work outward with a squeegee. A light spray of water with a drop of dish soap allows repositioning; check that your supplier supports the wet method first.
- Work out air bubbles. Push bubbles to the nearest edge with a squeegee. Small bubbles often disappear after a few days in the sun.
- Remove the carrier film. Peel the transfer tape or carrier film slowly at a low angle, then press the edges down firmly.
Professional application vs. DIY.
Removal and replacement
Quality vinyl stickers can be removed without damaging paint if done carefully. Warm the sticker gently with a heat gun or hair dryer on a low setting, then peel slowly at a low angle. Any residual adhesive comes off with rubbing alcohol. Avoid pulling straight up or working in cold weather, as cold vinyl is more likely to tear or leave adhesive behind.
Ordering Your Custom Stickers from Mega Sticker Store
Ordering custom vanlife stickers shouldn't be complicated. Here's how it works.
Frequently Asked Questions
How long do custom vanlife stickers last on a camper?
Premium outdoor vinyl decals typically last 5-7 years when made from quality materials like those used in custom camper van decals. UV-resistant vinyl with gloss overlaminate protection resists fading, cracking, and peeling through sun exposure, rain, and temperature changes. Longevity depends on climate, vehicle care, and the quality of the adhesive and vinyl grade used during production.
Can custom camper van decals be removed without damaging the paint?
Yes, when applied and removed correctly. High-quality vinyl stickers designed for vehicles are engineered to peel away cleanly without leaving residue or damaging clear coat. Remove stickers slowly at a low angle, applying gentle heat with a hairdryer if needed to soften the adhesive. Poor removal technique or low-grade vinyl can damage paint, so always follow application instructions from your supplier.
What should I put on a personalised camper van sticker?
Popular choices include your camper's name, family names, travel destinations visited, funny sayings, or a custom caricature from a favourite travel photo. Many owners combine text with graphics like mountains, nature motifs, retro designs, or vanlife themes. Consider your vehicle's colour and style when choosing fonts and artwork to ensure the design complements your camper's aesthetic.
What vinyl is best for camper van decals?
Exterior-grade, UV-resistant vinyl is essential for camper van decals. Look for materials rated for 5-7 years of outdoor use, with a gloss overlaminate finish for scratch and UV protection. Premium outdoor vinyl handles temperature fluctuations, moisture, and harsh sun better than standard vinyl. Custom camper van decals from quality suppliers use professional-grade vinyl with strong adhesives designed specifically for vehicle applications.
Your camper deserves stickers that match your adventures. Get started with Mega Sticker Store and transform your rig with custom vanlife stickers built to last through every journey.
