


Safety Compliance Stickers for Commercial Fleets: 2026 Guide
Table of Contents
- What Safety Compliance Stickers Do Commercial Fleets Actually Need?
- Fleet Decal Placement Guide: Where Each Sticker Belongs
- Reflective Safety Decals for Trucks and Trails
- Fleet Safety Sticker Inspection Checklist
- Custom Truck Safety Stickers and Fleet Branding
- Cost, Materials and Procurement Planning
- Conclusion: Building a Sticker Compliance System That Lasts
- Frequently Asked Questions
Last Updated: October 14, 2026
What Safety Compliance Stickers Do Commercial Fleets Actually Need?
Safety compliance stickers for commercial fleets are the labels, decals and reflective markings that identify vehicles, warn of hazards and meet visibility and identification requirements on Australian roads.
At Mega Sticker Store, we make Australian-made vinyl decals for this purpose, and fleet operators ask the same questions: Which stickers are mandatory? Where do they go?
This guide covers what each vehicle type needs, where labels belong, how to inspect them, and how to plan the spend.
Vehicle and fleet safety decals
Fleet safety decals cover everyday identification: fuel type labels, isolator warnings, load and dimension markings, and company identification. These prevent mistakes rather than satisfy a checklist.
Fuel misidentification is the classic example: a diesel vehicle filled with petrol, or the reverse, means a costly drain and repair. Clear fuel identification stickers on the filler cap and tank remove the guesswork.

Battery and starter isolator labels tell a technician which switch does what, preventing expensive wiring errors on a mixed fleet.
For fleets that carry multiple fuel types, a practical starter set looks like this:
| Sticker Type | Typical Placement | Why It Matters |
|---|---|---|
| Fuel identification label | Filler cap, fuel tank | Prevents misfuelling |
| Isolator warning decal | Battery box, control panel | Prevents wiring errors |
| Load and dimension marking | Vehicle sides, rear | Flags height and mass limits |
| Company identification | Doors, panels | Identifies the operator |
Hazard and warning identification
Hazard identification labels flag the risks a vehicle carries or creates: dangerous goods, high-voltage systems, hot surfaces, moving parts and pressurised equipment.
The most common mistake is treating hazard labels as a one-off purchase.
Durability is the deciding factor. Outdoor-grade vinyl with UV-resistant printing holds colour and adhesion far longer than cheap alternatives, so material choice matters as much as wording.
Fleet Decal Placement Guide: Where Each Sticker Belongs
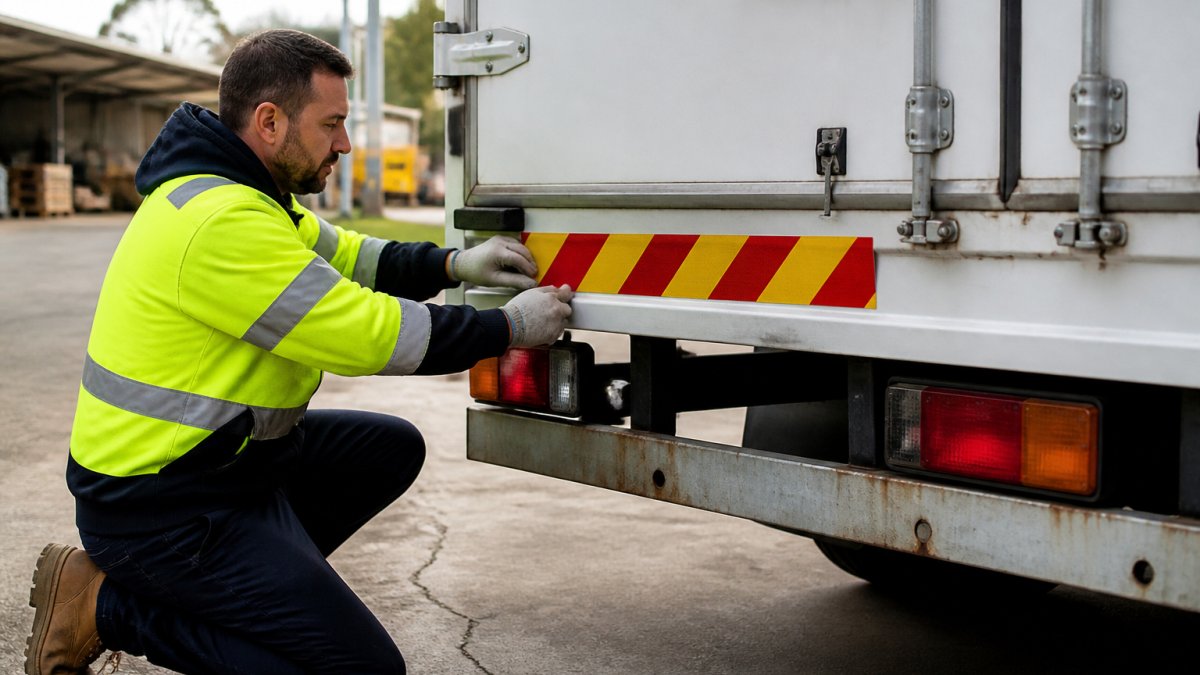
Placement matters as much as the sticker itself, a correctly worded label in the wrong spot is invisible when it counts. This guide covers where each category belongs by vehicle type under Australian rules.
Sticker placement by vehicle type
Different vehicles carry different risks, so placement rules change with the platform. These guidelines reflect common requirements under state and territory road transport and WHS laws. Always confirm current rules with your state or territory road authority and workplace safety regulator.
Trucks (rigid and prime movers)
- Fuel identification labels: on or immediately adjacent to the filler cap and on the fuel tank itself. For multi-tank vehicles, label each tank.
- Battery and starter isolator warnings: on or next to the isolator switch, and inside the battery box lid.
- Height and mass markings: on the cab or front panel, visible to the driver before departure. Some jurisdictions require specific dimensions and colour contrast.
Trailers (including semi-trailers and dog trailers)
- Rear marker plates: on the rear corners, with reflective sheeting that meets the relevant Australian Standard for retro-reflective materials.
- Side reflective strips: along the full length of both sides, positioned to outline the trailer's dimensions at night.
- Turning-vehicle warning decals: at the rear, warning other road users of the trailer's swept path.
Buses and coaches
- Emergency exit and passenger warning labels: inside the vehicle, adjacent to each exit and emergency equipment.
- Reflective identification and turning warnings: outside, on the rear and sides.
- Accessibility and priority seating labels: inside, where required by disability access standards.
4WDs and light commercial vehicles
- Fuel identification: on the filler cap and tank.
- Isolator warnings: on or next to the battery isolator.
- Load markings: on the sides or rear, where the vehicle is used for carrying loads.
Boats and horse floats
- Fuel labels: on the filler cap and tank.
- Identification decals: on the sides and rear.
- Reflective markings: for road transport, on the rear and sides to improve night visibility.
Placement rules that apply everywhere
Regardless of vehicle type, three principles hold:
- Put the label where the person who needs it will be standing. A fuel sticker on the wrong side of the tank is decoration, not compliance.
- Make it readable from the distance it needs to be read. Hazard warnings may need legibility from several metres; fuel labels only at the filler point.
- Do not obscure the label with equipment, dirt or other decals. Account for how the vehicle is loaded and cleaned.
Jurisdiction-specific considerations
Australia's road transport and WHS laws are state and territory based. While the Australian Design Rules and model WHS Regulations provide broad consistency, requirements for reflective markings, dangerous goods placards and vehicle identification can differ: Navigating these regional variations becomes even more critical when synchronizing fleet maintenance schedules with the latest DOT inspection requirements.
- Dangerous goods vehicles may require placards complying with the Australian Dangerous Goods Code, with specific placement and size requirements.
- Some states require extra reflective markings on long vehicles or those operating at night.
- Workplace safety regulators may require specific warning labels on plant and equipment under the model WHS Regulations.
Always check current requirements with your state or territory road authority and workplace safety regulator, and document your interpretation with the vehicle record.
Placement diagrams by vehicle type
Create placement diagrams for each vehicle class: a side and rear outline, required decal positions, and the dimensions and wording for each. Keep them with your compliance records and update them whenever regulations or vehicle configurations change, this turns a generic guide into a fleet-specific reference any supervisor can follow.
Reflective Safety Decals for Trucks and Trails
Reflective safety decals for trucks and trailers make a vehicle visible when light is poor, at night, in rain and in low-visibility conditions, when a plain painted surface disappears into the dark.
Reflective vinyl returns light toward its source, so headlights pick the vehicle out far earlier. For trailers, rear markers and side reflective strips are the priority; for trucks, rear and corner markings do the heavy lifting.
Understanding reflective grades and Australian Standards
Not all reflective vinyl is created equal. In Australia, retro-reflective materials for vehicles are classified under Australian Standard AS 1906. The class you need depends on vehicle type and operating conditions.
- Class 1 materials are generally used for rigid vehicles and have a lower retro-reflective performance.
- Class 2 materials offer higher performance and are commonly used on heavy vehicles and trailers.
- Diamond-grade or high-intensity prismatic materials provide the highest level of retro-reflectivity and are often specified for long vehicles, dangerous goods transport, and vehicles operating in poor visibility.
When ordering reflective decals, ask your supplier which class or grade the material meets. A product that does not state AS 1906 compliance may not meet your vehicle class requirements.
Material selection for operating conditions
Beyond the reflective grade, the base material and adhesive determine how long a decal lasts. Most fleet decals use cast or calendered vinyl.
Petrol Identification Stickers - Durable Fuel Labels for Clear Fuel System →
- Cast vinyl is thinner, conforms better to curved surfaces, and typically has a longer outdoor life. It is the better choice for complex curves and for vehicles that are frequently washed or exposed to harsh conditions.
- Calendered vinyl is thicker and less expensive, but it may not conform as well to curves and can shrink over time. It is suitable for flat surfaces and shorter-term applications.
Adhesive quality also matters: a high-tack, pressure-sensitive outdoor adhesive holds better than general-purpose adhesive, especially under heat, cold and moisture. Coastal fleets should consider enhanced salt-spray resistance.
Inspection and maintenance schedule
Reflectivity degrades over time. Dirt, UV exposure and repeated washing reduce how much light a decal throws back, a dull reflective sticker is no longer usefully reflective.
Include reflectivity in your inspection routine, not just adhesion. A monthly night-time torch check identifies decals that are no longer performing; if it does not light up, replace it.
A practical maintenance schedule for fleet reflective decals:
- Monthly: Visual inspection for damage, lifting edges, and dirt build-up. Clean with a soft cloth and mild detergent.
- Quarterly: Night-time reflectivity check with a torch. Replace any decal that does not reflect clearly.
- Annually: Full audit of all reflective markings against current requirements. Check for fading, cracking, and adhesion failure.
Replacement triggers
Replace reflective decals when:
- The decal no longer reflects light effectively under a torch at night.
- The surface is cracked, faded, or has lifted edges.
- The decal has been damaged by impact, scraping, or chemical exposure.
Keep a small stock of common reflective decals so you can replace them immediately rather than waiting on an order, especially important for vehicles operating at night or in poor weather.
Choosing the right reflective decals for your fleet
When selecting reflective decals, consider:
- The vehicle class and required AS 1906 grade.
- The operating environment (coastal, inland, high UV, frequent washing).
- The surface type (flat panels, curved tanks, corrugated surfaces).
Standardising on one grade and material across similar vehicles simplifies procurement and inspection, and ensures every vehicle meets the same visibility standard.
Fleet Safety Sticker Inspection Checklist
A fleet safety sticker inspection checklist turns a vague "check the stickers" task into something a driver or supervisor can complete in minutes. Run it monthly and before any long trip or audit.
Use this checklist per vehicle:
- Every required decal is present and in its correct position
- Text is fully legible with no fading, cracking or peeling
- Reflective decals still reflect under a torch at night
The point of the checklist is the log, not the walk-around: a record of what you checked and when turns a stack of stickers into a documented compliance system.
Custom Truck Safety Stickers and Fleet Branding
Custom truck safety stickers let you meet identification requirements and build your brand at once, a compliant decal need not look generic.
Custom sizing matters: curved panels, odd angles and non-standard tank shapes are common, and off-the-shelf sizes often do not fit cleanly.
We make our decals in Australia from premium outdoor vinyl, with custom sizes and colours.
For fleets, standardise: pick one fuel label design, one isolator design and one reflective marker design, then apply them consistently across every vehicle.
Cost, Materials and Procurement Planning
Budgeting for fleet stickers is straightforward once you separate consumables from one-offs. Fuel, isolator and warning labels are consumables; reflective markings and branded identification are closer to semi-permanent.
Materials drive both cost and lifespan. Outdoor-grade vinyl with UV-resistant printing costs more up front and lasts far longer than thin indoor stock. On a fleet, the cheaper option usually costs more over a few years because you replace it more often.
A simple procurement plan:
- Audit what you have. Count vehicles, note missing or faded decals.
- Standardise designs. One set of label types across the fleet.
- Buy in packs. Multi-packs reduce unit cost and keep spares on hand.
- Hold a spares kit. A small stock of common labels means same-day replacement.
- Review annually. Recheck materials against how the decals actually held up.
For fuel labelling specifically, our Petrol Identification Stickers come as a 24-pack of 65mm x 25mm labels made from weather and UV-resistant vinyl, which suits fleets that need spares on hand. If your fleet runs diesel, the large Diesel Fuel Stickers at 130mm x 50mm give you bold, high-visibility identification for tanks, pumps and equipment.


Conclusion: Building a Sticker Compliance System That Lasts
The hardest part of fleet sticker compliance is not buying the labels, but keeping them legible, correctly placed and documented across every vehicle, every year.
Mega Sticker Store makes Australian-made vinyl decals built for outdoor use, with custom sizes and colours, UV-resistant materials and multi-packs that suit fleet procurement.
Shop Australian Decals with Mega Sticker Store and build a sticker system that holds up to inspection, weather and time.
Frequently Asked Questions
What safety stickers should commercial fleet vehicles have?
Most fleets need reflective rear markers, turning-vehicle warning signs, fuel identification labels and hazard warnings for onboard equipment. Buses and coaches also need passenger-transport safety labels. The exact set depends on your vehicle types and operating conditions, so start by listing every vehicle in your fleet, then map the applicable requirements to each one. Fuel identification stickers are a practical starting point for any fleet running mixed petrol and diesel vehicles.
Where should safety and identification decals be placed on fleet vehicles?
Place reflective markers at the rear and sides where other drivers will see them in low light. Fuel identification labels go on or beside the fuel cap. Battery isolator and warning stickers belong on or near the relevant switch or panel. Turning-vehicle warnings sit at the rear corners. A fleet decal placement guide should document the exact position for each vehicle type so every unit in your fleet is marked consistently.
How can fleet stickers remain readable in poor light and bad weather?
Choose reflective safety decals for trucks that use outdoor-grade vinyl with UV-resistant and weather-resistant properties. Reflective materials bounce light back toward the source, so they stay visible at night and in rain. Gloss overlaminate adds another layer of protection against fading and peeling. Check that the adhesive is rated for outdoor use, and inspect stickers regularly for lifting edges or fading, replacing them before readability drops.
Can fleet safety stickers be customised with a company logo or vehicle number?
Yes. Ordering custom sizes and colours lets you keep the safety text bold and legible. If you run a mixed fleet, standardise the layout across all vehicles so the safety information sits in the same position on every unit, which makes inspections faster and helps new drivers find critical labels quickly.