


How to Design Custom Vehicle Graphics That Fit and Last
Last Updated: November 2, 2026
Quick Summary
Design custom vehicle graphics by writing a one-sentence brief, listing the panels and viewing distance, and setting a budget cap before opening any software. Then use an accurate, scaled vehicle template, build the artwork in named layers, and keep text and logos clear of seams, windows and handles.
- A parked work van is read at 2 metres, a moving vehicle at 20.
- Cast vinyl suits full wraps and curves; calendared film is cheaper and fine for flat decals.
- Lock the template layer at the bottom of your layer stack immediately.
- Rank content as logo, what you do, one contact method, then everything else.
- Confirm model year, trim and accessories like bull bars before signing off the file.
Table of Contents
- Plan the Design Before You Open Any Software
- Choosing Decals, a Partial Wrap or a Full Wrap
- Start With an Accurate Vehicle Wrap Design Template
- Pick Vehicle Graphics Design Software That Handles Scale
- Build the Artwork in Layers and Keep It Organised
- Business Vehicle Graphics Ideas That Read at a Distance
- Design Around Doors, Windows, Handles, Seams and Curves
- How to Apply Vehicle Graphics and Prepare Print-Ready Files
- Frequently Asked Questions
Plan the Design Before You Open Any Software
Most people open a design program first and figure out the layout later. That order wastes hours.
The same pattern shows up often in vehicle graphics projects: the artwork is built before anyone measures the van, checks the sightlines, or decides what the graphic has to say.
Here is the planning sequence we recommend:
- Write one sentence describing what the vehicle must communicate.
- List the panels you want to cover and roughly how much space each one gives you.
- Note the viewing distance. A parked work van is read at 2 metres. A moving vehicle is read at 20.
- Decide the budget cap before you fall in love with a full wrap design.
That last point matters. A full wrap changes the whole vehicle. A partial wrap or a set of decals covers selected panels.
Watch out: designing at the wrong scale is the single most common reason artwork looks wrong on the vehicle.
Once the brief is one page long, you are ready to move to software. Readers who would rather hand the work over can learn what a professional vehicle decal design service does.
Choosing Decals, a Partial Wrap or a Full Wrap
Decals are cut vinyl shapes applied to specific spots. A partial wrap covers some panels. A full wrap covers the whole body. Each suits a different job.
The choice comes down to coverage, budget, how much of the original paint you want to keep visible, and how long you expect the graphic to last outdoors. If you are unsure which vinyl is best for outdoor vehicle graphics, the film choice matters as much as the format.
| Option | Coverage | Best for | Trade-off |
|---|---|---|---|
| Decals | Small, targeted areas | Logos, names, stripes, safety markings | Less visual impact from a distance |
| Partial wrap | Selected panels | Branding one or two sides of a van | Design must work with the uncovered paint |
| Full wrap | Whole body | Maximum brand presence | Highest material and install cost |
For caravans, motorhomes and 4WDs, decals and stripe kits let you personalise a vehicle without covering factory paint you may want to keep.
Match the film to the job, not just the price
Vehicle graphics live outdoors, so the film and laminate matter as much as the artwork. A few practical distinctions:
- Cast vs calendared film. Cast vinyl conforms to curves and rivets and is the usual choice for full wraps and complex panels. Calendared film is cheaper and fine for flat decals and stripe kits, but it resists deep curves less well and can lift at edges over time.
- Removable vs permanent adhesive. Removable adhesive suits leased vehicles and seasonal campaigns. Permanent adhesive is the default for long-term branding.
- Laminate. A UV overlaminate protects printed colour from fading and adds scuff resistance. Gloss laminate lifts colour; matte laminate reduces glare and hides surface imperfections.
A common pattern is that buyers compare quotes on price per square metre without checking film type or laminate. A cheaper calendared film on a flat panel can be perfectly sensible; the same film on a deeply curved caravan nose is where early lifting starts.
Plan for maintenance and removal
- Wash graphics with a soft mitt and mild detergent; avoid high-pressure jets held close to edges.
- Expect printed colour to fade gradually in strong sun, laminate slows this but does not stop it.
- Removal is easier when the film was applied to clean, sound paint. Old or failing paint can come away with the vinyl.
custom van side graphics for campers offer a bold side treatment for campers.

Start With an Accurate Vehicle Wrap Design Template
An accurate vehicle wrap design template is a scaled outline of your specific vehicle's panels, supplied by the manufacturer or a template library.
Without one, you are guessing. And guessing produces artwork that runs into a door seam or stops short of the panel edge.
Here is how to verify a template before you trust it:
- Confirm the make, model and body variant match your vehicle exactly
- Check the template's scale is stated, usually 1:10 or 1:20
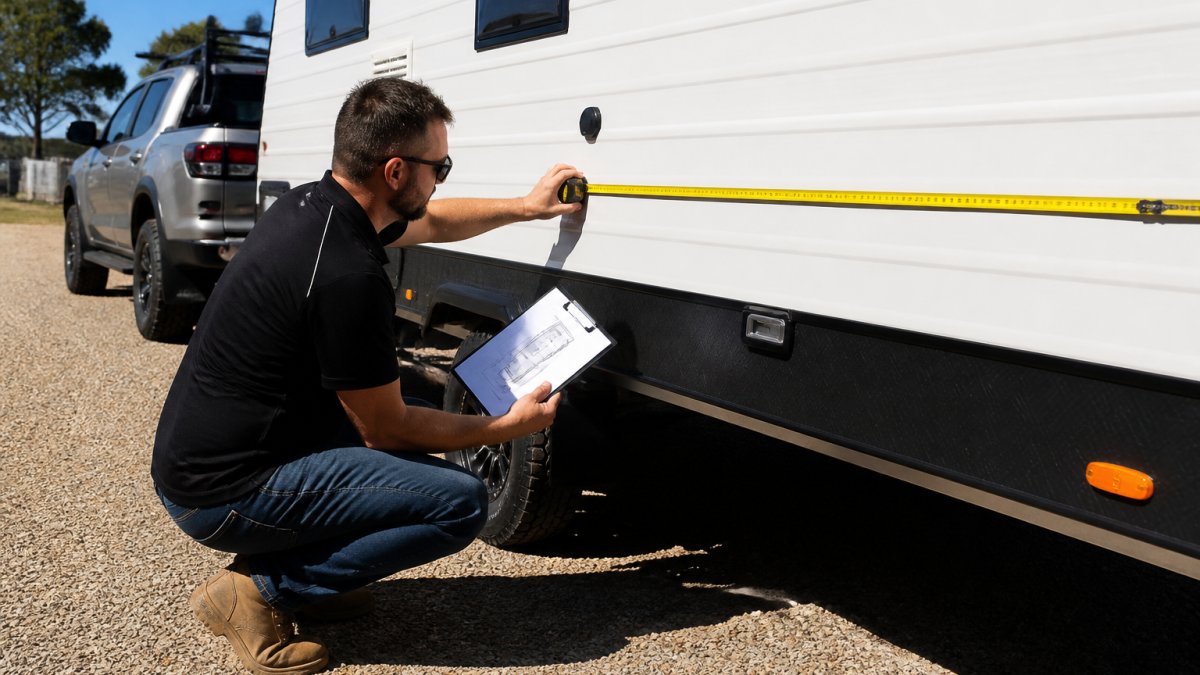
- Measure two panels on the real vehicle with a tape measure
- Compare those measurements against the template
That last check catches more problems than the rest combined. Aftermarket additions are rarely on a standard template, and they change where your graphic can safely sit.
Pick Vehicle Graphics Design Software That Handles Scale
Vehicle graphics design software needs one non-negotiable feature: it must work in real-world units at true scale.
Free options exist, but check that they support vector output and custom document sizes measured in millimetres.
What to look for:
- Vector tools. Vinyl is cut, not printed, for most decal work. Vectors scale without blurring.
- Custom canvas size. You must be able to set a document to, say, 4000mm by 1200mm.
- Layer support. Covered in the next section, but confirm it now.
- Colour mode. CMYK for printed wraps, spot colours for cut vinyl.
Set your document up in millimetres and at full size if your software can handle it.
Cut vinyl needs clean vector paths, so raster artwork is not suitable for cutting.
Custom Personalized Vinyl Decal for Vehicles: Transform Your Ride →
Build the Artwork in Layers and Keep It Organised
Layers are what let you fix one element without rebuilding the file.
Set your layer stack up like this:
- Template layer (locked, at the bottom)
- Background colour or base film
- Main graphics and shapes
- Logo and brand marks
- Text and typography
- Cut and trim lines (top)
Lock the template layer immediately. It is too easy to nudge a panel outline by accident and spend an hour hunting for the error.
Name every layer and every group in plain language. "Layer 4 copy 2" tells the installer nothing.
Keep all text as live text until the final proof. Once you convert to outlines, editing becomes harder.
Business Vehicle Graphics Ideas That Read at a Distance
Business vehicle graphics work when they are readable at speed.
Rank your content in this order:
- Logo or business name in the largest size
- What you do, in three to five words
- One contact method, phone or website, not both
- Everything else only if space allows
Typography choices carry most of the legibility. Use a bold sans-serif for the main message and keep to two typefaces at most.
Colour matters just as much. High contrast between text and background is what makes a design readable from 20 metres.
For caravans and campers, the brief is different. You can also order a custom personalised vinyl decal for vehicles with your own text or image. A custom personalised vinyl decal for vehicles lets you add your own text or image, which suits travellers who want the rig to feel like theirs.

If you want a ready-made starting point, a universal racing stripe decal kit gives a clean, aggressive look across flat panels.

Design Around Doors, Windows, Handles, Seams and Curves
Vehicle panels are not flat. Doors, windows, handles, seams and curves all interrupt the artwork, and a design that ignores them will look broken once applied.
Treat every interruption as a design feature, not an obstacle.
Practical rules to keep in mind:
- Keep logos clear of door seams. A logo split by a seam reads as two half-logos.
- Do not run text across a window. It cannot be applied there.
- Leave a margin around handles. Vinyl needs flat surface to bond.
- Check curves before committing. Deep curves need a more flexible film and more installer skill. For step-by-step guidance, see how to apply custom vinyl graphics to curved surfaces.
How to Apply Vehicle Graphics and Prepare Print-Ready Files
Print-ready artwork means the file needs no further edits before production. Get this wrong and the whole job stalls. This section connects the file handoff to the install so nothing is lost between designer, printer and applicator.
Preflight checklist
Run this before you send anything to print or cut:
- Document is at true scale, in millimetres
- All text converted to outlines
- Colours set to CMYK or spot, as required
- Images at 150 dpi or higher at final print size
Verify measurements before the file leaves your hands
Templates are only as good as the vehicle they describe. Before sign-off, confirm:
- Model year and trim. Badges and panel shapes change between facelifts; a template for the wrong year will misalign at doors and arches.
- Two real measurements. Tape-measure a door width and a rear quarter panel on the actual vehicle and compare against the template.
- Accessories. Bull bars, roof racks, tow bars and aftermarket flares are rarely on a standard template and change where graphics can sit.
- Panel gaps. Note seam positions so the printer can add bleed and the installer knows where to trim.
A short handoff sheet, vehicle details, measurements, film and laminate spec, cut-line layer name, and any no-go zones, saves more reprints than any single design decision.
Application sequence
Clean the panel first: wash, then wipe with a suitable surface cleaner, and let it dry fully. Position the decal dry with masking tape as a hinge. Apply with a squeegee, working from the centre out to push air ahead of the film. Remove the transfer tape at a low angle, close to the surface.
We offer premium vehicle stripe sticker kits with a glossy overlaminate. Custom sizes and colours are available on request.
Frequently Asked Questions
How do you measure a vehicle for custom graphics?
Measure each panel separately rather than the whole vehicle. Record the flat width and height of every door, guard and side panel, then note where handles, seams, windows and curves interrupt the surface. Measure twice at different points because panels taper. Compare your numbers against a manufacturer template or a supplier's template before you draw anything. If a panel is curved or an odd shape, order a custom-cut decal sized to your measurements rather than forcing a standard size to fit.
What file format should vehicle graphics be supplied in?
Supply vector artwork, such as AI, EPS or a print-ready PDF, so lines and logos stay sharp at full vehicle scale. Raster images need to be at least 150 dpi at final size. Convert all text to outlines, embed or flatten linked images, and set the document to the vehicle's actual size in millimetres. Add a bleed of 10 to 20 mm and keep critical elements inside the safe area. Ask for a proof before production.
How do you design graphics around vehicle doors, windows and curves?
Mark every door edge, handle, window and seam on your template first, then treat those marks as no-go zones for logos and text. Keep key branding on flat panels and let background colour or pattern run across the gaps. On curves, artwork compresses visually, so stretch text slightly or shift it to a flatter area. Check that door lines still fall where they should once the graphic is applied, and confirm nothing covers lights, number plates or safety glass.
How long do custom vehicle graphics last?
Durability depends on the vinyl, the laminate and how the vehicle is stored. Mega Sticker Store's decals use premium outdoor vinyl. Parking undercover and washing with a mild detergent can help. Check the supplier's stated terms before ordering, and confirm the vinyl suits your surface.
