


7 Steps to Remove Old Vehicle Decals Without Paint Damage
Last Updated: November 4, 2026
Quick Summary
To remove old vehicle decals without paint damage, soften the vinyl with a heat gun or hair dryer on medium heat, then peel it back slowly at a shallow angle using a plastic scraper. Keep the heat moving, never scrape dry adhesive, and finish by cleaning residue with isopropyl alcohol before polishing and waxing the panel.
- Keep the heat gun nozzle at least 10 cm from the panel and never hold it in one spot.
- Vinyl turns brittle below about 10°C and snaps instead of stretching, so work in a shed or on a mild day.
- Use a plastic scraper or old credit card; metal blades gouge the panel in one stroke.
- Never use acetone, paint thinner or nail polish remover, which strip clear coat on contact.
- Finish with a coat of car wax to protect the clear coat and slow further fading.
Table of Contents
- What You'll Need Before You Start Removing Old Vehicle Decals
- Step 1: Soften the Decal With a Heat Gun or Hair Dryer
- Step 2: Peel the Vinyl and Use a Plastic Scraper
- How to Use a Caramel Wheel on Car Decals
- Best Adhesive Remover for Car Paint
- Removing Vinyl Graphics Without Damaging Clear Coat
- Step 3: Clean, Polish and Wax the Area
- Common Mistakes to Avoid When Removing Old Vehicle Decals
- Frequently Asked Questions
What You'll Need Before You Start Removing Old Vehicle Decals
Old decals come off cleanly when the vinyl is soft, the tools are gentle, and the paint is cool to the touch.
A decal that has baked onto a panel for five summers will not peel like a fresh one. It cracks, snaps and leaves glue behind. The good news is that patience and the right gear beat force every time.
Below, we'll show you the tools to gather, the seven steps that work, and the mistakes that cost people a respray.
Tools and Materials
Gather everything before you touch the vehicle. A half-finished removal is how paint gets scratched.
- Heat gun or hair dryer with a medium heat setting
- Plastic scraper or old credit card
- Rubber eraser wheel for the drill
Skip metal blades, kitchen scourers and anything abrasive. They will mark the panel in seconds.
Safety Precautions for Car Paint and Skin
Heat is the biggest risk, to both you and the paint. Keep the gun moving and never hold it in one spot. Vinyl softens fast, and clear coat scorches faster.
- Keep the nozzle at least 10 cm from the panel
- Test on a hidden area first, such as inside a door jamb
- Work in shade, not direct sun
Watch out: holding a heat gun still on one spot can blister clear coat in seconds, and no polish will fix that.
Step 1: Soften the Decal With a Heat Gun or Hair Dryer
Warm the vinyl until it turns soft and slightly glossy, then start at a corner. Thermal softening is what separates a clean peel from a frustrating scrape.
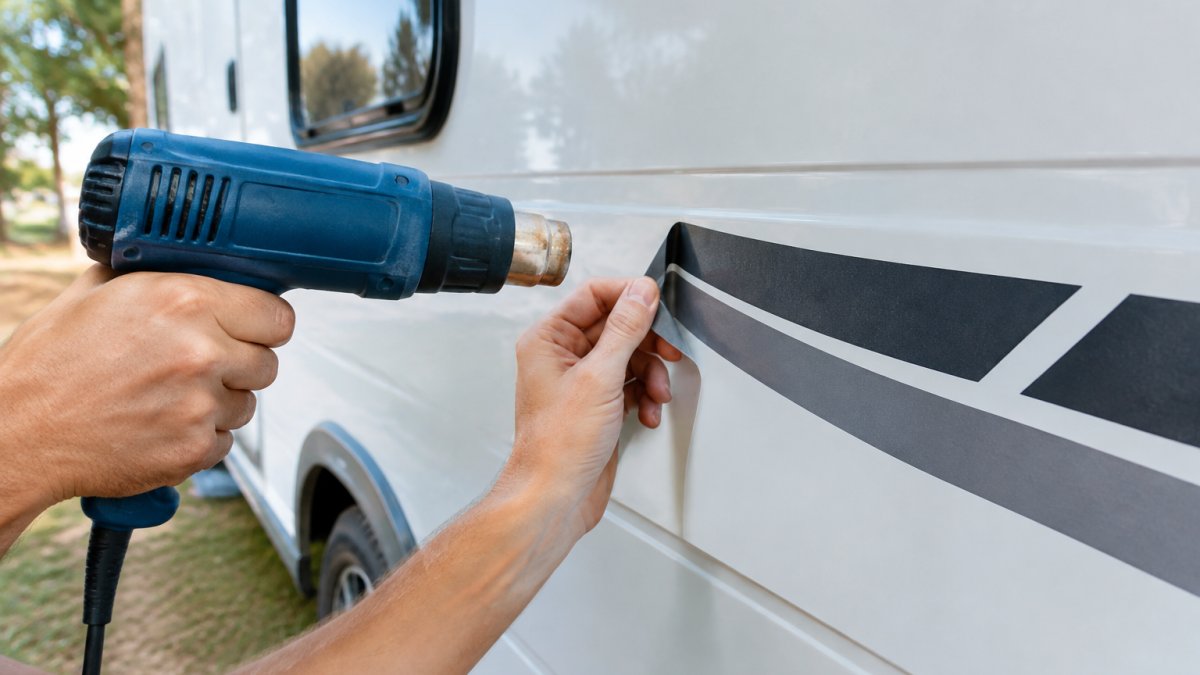
Move the gun back and forth across the decal in slow passes. Do not rush.
In cold weather, work inside a shed or wait for a mild day. Vinyl turns brittle below about 10°C and snaps instead of stretching.
Step 2: Peel the Vinyl and Use a Plastic Scraper
Lift one corner with your fingernail or a plastic scraper, then pull the vinyl back on itself at a shallow angle.
Keep the scraper almost flat against the panel. Angling it up digs the edge into the clear coat.
Work in sections on large graphics. Peel a strip, warm the next area, peel again.
If you want to understand how removable vinyl behaves before you start, our guide on removable, reusable vinyl decals explains what to expect from the adhesive.
How to Use a Caramel Wheel on Car Decals
A caramel wheel, also called a rubber eraser wheel, spins adhesive off a panel without solvent. Fit it to a drill, run it at a low speed, and keep it moving.
- Keep the wheel flat against the surface
- Use light pressure and let the friction do the work
- Stop if the panel feels hot
Watch out: too much speed or pressure generates heat fast, and a rubber wheel can burn through clear coat. Practice on a hidden area first.
Avoid the wheel on curved panels, decal edges and pinstripes. Hand peeling is safer there.
Best Adhesive Remover for Car Paint
The best adhesive remover for car paint is one that softens glue without attacking the clear coat. Isopropyl alcohol is the safest starting point.
Soak a microfibre cloth, press it against the residue for a minute, then wipe. Let the product do the work instead of scrubbing.
- Isopropyl alcohol: gentle, evaporates clean, good for light residue
- Purpose-made adhesive remover: stronger, follow the label
- Mineral spirits: effective but harsher, test first and rinse well
Never use acetone, paint thinner or nail polish remover. They strip clear coat on contact.
Removing Vinyl Graphics Without Damaging Clear Coat
Removing vinyl graphics without damaging clear coat comes down to three habits: warm the vinyl, lift it slowly, and never scrape dry adhesive with a hard tool. Clear coat is a thin layer, and every shortcut shows up later as a dull patch or a scratch.
- Keep heat moderate and moving
- Use plastic, never metal
- Lubricate with alcohol or remover before scraping
That is the universal advice. What most guides skip is that the right technique depends on what is under the vinyl and what the weather is doing.
Match the method to the paint type
Factory clear coat over base coat. This is the most forgiving surface. Because a sound clear coat helps decals adhere without lifting at the edges, the same care with surface preparation can help stop helmet decals peeling.
Single-stage paint (solid colour with no separate clear layer). Older vehicles and some resprays use single-stage paint, where the colour itself is the top surface.
Resprayed or aftermarket panels. Cure time and film thickness vary.
Vinyl wraps. Never use a heat gun aggressively on a wrap. Wrap film softens and can stretch or lift at the edges, and an eraser wheel will chew straight through it.
Cold-weather technique
Vinyl turns brittle below about 10°C and snaps instead of stretching, which is how clear coat gets lifted with the decal. In cold conditions:
- Work inside a shed or garage where you can hold a stable temperature
- Warm the panel gently and evenly before you start, not just the decal
- Use a hair dryer on medium rather than a heat gun, and keep it moving
A common pattern in cold weather is a decal that peels cleanly for ten centimetres and then tears, taking a fleck of clear coat with it. That is a sign the vinyl has cooled below its flexible range, stop, re-warm, and start again rather than pulling harder.
Know when to stop
If a decal will not lift after repeated warming, or if you see the paint surface dulling or colour transferring to your cloth, stop. A panel that needs professional correction is cheaper than a panel that needs a respray.
Step 3: Clean, Polish and Wax the Area
Clean-up is where most guides stop at 'wipe it down and wax it'. That is fine for a decal that has been on for a year.
Clean the residue first
Wash the panel with car wash soap and clean water to lift dust and grit. Then wipe with isopropyl alcohol on a microfibre cloth. This removes the last film of adhesive and, just as importantly, shows you exactly what you are dealing with: clean paint, light adhesive haze, or a visible ghost outline.
If adhesive is still tacky, go back to the adhesive remover step rather than polishing over it. Polishing a glue film just smears it into the pad.
Assess the ghost before you polish
Hold a torch at a low angle across the panel. A low-angle light reveals the true edge of the ghost far better than overhead light. Then judge the severity:
- Light haze or dull patch: polishing compound will usually bring it back.
- Distinct brighter outline: the clear coat under the decal is intact and the surrounding paint has faded. Polishing alone will not fix this; you are correcting the surrounding panel, not the decal area.
- Yellowed or cracked residue: the vinyl has left adhesive or plasticiser in the clear coat. This needs a dedicated adhesive remover and possibly a light clay bar before polishing.
Polish in the right order
Apply polishing compound with a soft applicator pad and light pressure, working small circles and buffing off with a clean microfibre cloth.
A common pattern is to polish too hard in one spot and create a new dull patch.
Watch out: polishing over a ghost outline on single-stage paint can lift colour and make the outline more obvious, not less.
When polishing is not enough
If the ghost survives polishing, the options are paint correction by machine polisher with a trained operator, or a glaze and wax to optically blend the area. For a permanent fix on a faded panel, a panel respray or a fresh graphic over the top are the realistic choices. Be honest with yourself about which one the panel needs before you spend hours with a compound.
Protect the finish
Finish with a coat of car wax to protect the clear coat and slow further fading. Wax will not hide a ghost, but it will keep the corrected area from dulling again quickly. If you are refreshing the look afterwards, our SUV vinyl graphics and body kit stripes are cut for curved panels and awkward angles.
Common Mistakes to Avoid When Removing Old Vehicle Decals
Most paint damage during decal removal comes from impatience, not bad products. Here are the errors we see most often.
- Skipping the heat. Cold vinyl snaps and takes clear coat with it.
- Using a metal blade. It gouges the panel in one stroke.
- Overheating one spot. Blisters clear coat beyond repair.
One more: pulling the vinyl straight up instead of back on itself. That lifts paint edges and stretches the graphic.
Most paint damage during decal removal comes from impatience, not bad products, so here are the errors we see most often.
| Mistake | Why it damages paint |
|---|---|
| Skipping the heat | Cold vinyl snaps and takes clear coat with it |
| Using a metal blade | It gouges the panel in one stroke |
| Overheating one spot | Blisters clear coat beyond repair |
| Scraping dry adhesive | Always lubricate first |
| Using acetone or thinners | They dissolve the clear coat |
| Rushing the clean-up | Leftover adhesive traps dirt and dulls the finish |
| Pulling vinyl straight up | Lifts paint edges and stretches the graphic |
Frequently Asked Questions
Will removing decals damage the paint on my vehicle?
It can, but only if you skip the softening step or use the wrong tool. Vinyl comes off cleanly when the adhesive is warm and pliable. Scraping cold vinyl with a metal blade, or holding a heat gun too close for too long, is what causes paint damage. Work in shade, keep the gun moving, and use a plastic scraper or caramel wheel rather than a blade. On older paint, test a small corner first to see how the clear coat responds.
What is the best tool to remove old vinyl stickers?
For most jobs, a heat gun plus a plastic scraper handles the bulk of the vinyl. A rubber eraser wheel (caramel wheel) on a drill removes the stubborn adhesive left behind without gouging the paint. For residue in tight areas, isopropyl alcohol or a dedicated adhesive remover on a microfiber cloth works well. Avoid metal scrapers, razor blades and harsh solvents, which can scratch or dull the clear coat.
How do I remove sticky residue left behind after a decal?
Start with a caramel wheel on low speed to lift the bulk of the adhesive. For what remains, soak a microfiber cloth in isopropyl alcohol or a car-paint-safe adhesive remover and hold it against the residue for 30 seconds before wiping. Repeat rather than scrubbing hard. Once the surface is clean, polish the area and apply wax to restore the finish and protect the clear coat.
How long does it take to remove old, sun-baked decals?
Fresh vinyl can come off in 15 to 30 minutes. Sun-baked decals that have been on for years take longer, often one to two hours per panel, because the adhesive has cured onto the paint and the vinyl may crack and come off in small pieces. Soaking stubborn sections with a solvent and using a caramel wheel speeds things up. Plan for a full afternoon if you are working on a caravan or a 4WD with large graphics.
Removing old decals is a job of patience, not force. Warm the vinyl, peel slowly, clean thoroughly, and protect the panel with wax when you finish. If you would rather start fresh than patch up old graphics, Mega Sticker Store makes Australian-made decals from premium outdoor vinyl, with custom sizes and colours for caravans, motorhomes, 4WDs and boats. Get started with Mega Sticker Store and give your vehicle a finish that lasts.
